
User Guide
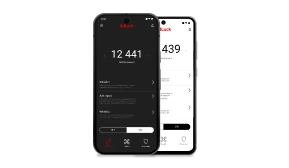
Android
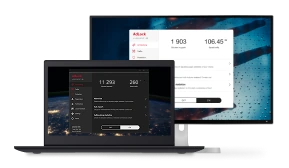
Windows

iOS
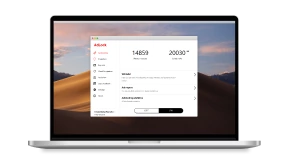
MacOS
AdLock Installation and Adjustment Guide
*Min. iOS 12.1 requiredWelcome aboard and thanks for choosing us!
AdLock for iOS is a powerful adblocking tool providing a radially new internet browsing experience on iPhones and iPads by Apple.
It blocks all types of pesky ads efficiently and protects your privacy by blocking tracking scripts. With AdLock for iOS, your Internet activities will play out in fresh colors — web pages will load much faster, the battery of your Apple device will live longer, and your sensitive data will shield up against sneaky spies and intruders.
Installation
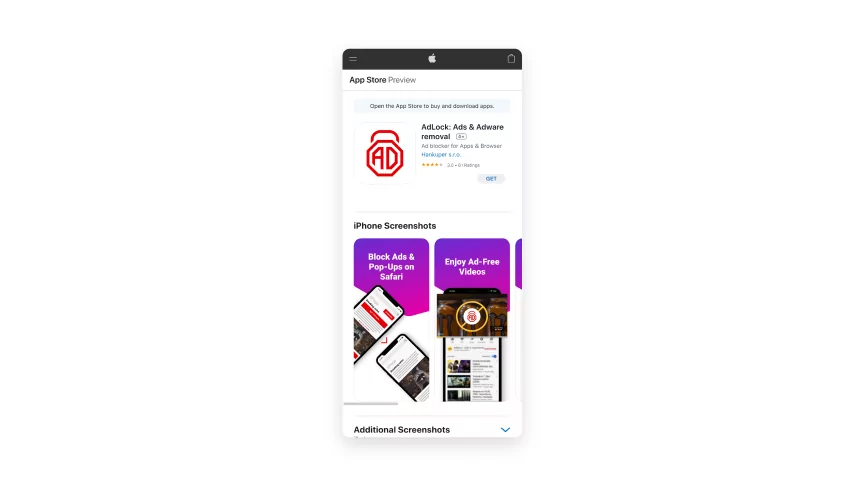
AdLock for iOS is available in the App Store. To install it on your device:
- Run the App Store application;
- Tap the “Search” icon on the bottom of the screen;
- Type “AdLock” in the search field, and then tap “AdLock” in the search results;
- On the App Store page tap the “GET” button under the string “AdLock: Ads & Adware removal”, and then press the “INSTALL” button;
- Type your Apple ID login and password in the dialogue window, and wait for the installation to complete.
Setting up adblocking
AdLock application for iOS is comprised of 2 functional modules:
- Content blocker for Safari browser — our free solution that disables adverts only in the Safari browser;
Follow the video instructions below to activate the content blocker on your device
- Systemwide ad and online surveillance blocking (performed via DNS filtering) in different applications and browsers, not only in Safari — paid functionality.
You can activate the paid DNS filtering in two ways:
- Purchase a subscription in the App Store (trial period of 7 days);
- Enter a code.
Buying through the App Store is pretty standard, so if you’ve already purchased applications there, you’ll have no issues with it.
To activate AdLock for iOS using a code:
- Launch the application;
- Navigate to the top right corner of the screen and press the profile icon (“Sign in” button);
- In the form that opens, instead of email, enter the license key, leave the password field blank and click the button “Done”.
If everything is done correctly, the input form will close automatically.
When everything is done, make sure both toggles on the main screen of the application are switched ON.

Upon completion of the above-mentioned steps, AdLock will operate efficiently and flawlessly in the majority of cases.
Ad-free YouTube with AdLock
As you may already know, the native YouTube application (both on iOS and Android) has an airtight defense leaving no chance of getting access to its code. Not a single one of the popular ad blockers on the market is capable of cleaning up the YouTube app of ads yet.
Nevertheless, there's no reason to get upset as AdLock is the adblocker that provides handy tools and features that would help you out.
With the recent update, AdLock users have 2 novel ways of watching adless YT — by engaging a special script developed and adjusted by our development team, or via the AdLock player.
Now, how do you do that?
1. Coping with YT ads using the AdLock script:
- Launch Safari;
- Go to youtube.com;
- Tap the “Share” button;
- Choose “Block YouTube ads”.
2. Using custom AdLock player :
- Launch the native YouTube app;
- Choose the video to watch;
- Tap “Share” under the video;
- Then tap “AdLock player”.
The player provided by the dedicated development team is a unique solution that combines simplicity, convenience, and a bunch of features. Users already admit its benefits so join the party!
If you face issues, feel free to contact our support agents.
AdLock Installation and Adjustment Guide
*Min. MacOS 11.0 requiredWelcome aboard and thanks for choosing us!
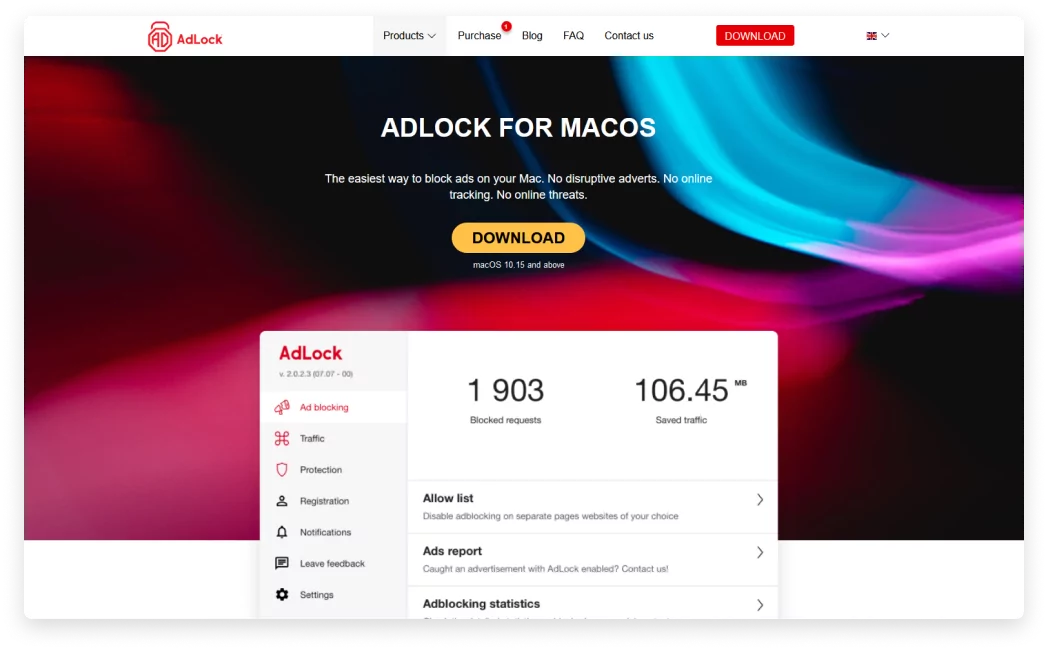
AdLock for macOS is a unique app made particularly for blocking ads, protecting users from phishing and personal data collecting on the Internet, that takes a cue from macOS architecture. AdLock works with Safari as well as with any other compatible browser. Apart from video ads and banners, AdLock for macOS brushes off other annoying website elements like contact/callback forms, online chats, weather widgets, unwanted redirects, etc.
Installation
AdLock for macOS devices is available via the official website, which is adlock.com.
*Please note, you can also get AdLock via a partnered MacOS software product.
To install AdLock for macOS on your computer:
- Launch your browser, type “adlock.com” in the address bar;
- Proceed to the “Products” menu tab, press “AdLock for Mac”, find the “Download” button and press it;
- Wait for “AdLock_Installer.pkg” to download and double-click its icon in the list of downloaded files on the Dock panel;
- Click the AdLock icon to start the installation;
- Upon the launch, you’ll need to agree to the terms of the licence agreement in order to continue, so press “Agree” and then “Continue”;
- In the next step, click “Install”;
- You’ll need to approve the installation by entering your security password;
- Wait until installer loads all the required files and services and press “Close”;
- The installation wizard will propose you to delete the installer package right after you press the “Close” button, so press “Ok” and “Move to bin”;
- Well done. Now launch AdLock from the Launchpad;
- You’ll see hints on setting up the application and required files/services, please be attentive;
- Allow AdLock to install its system extension via the “Security settings”;
- Check the “I agree with EULA and Privacy Policy” box and press “Start”;
- Install the System Certificate by AdLock and allow adding a proxy connection;
- Press “Ok” and enjoy your ad-free Internet!
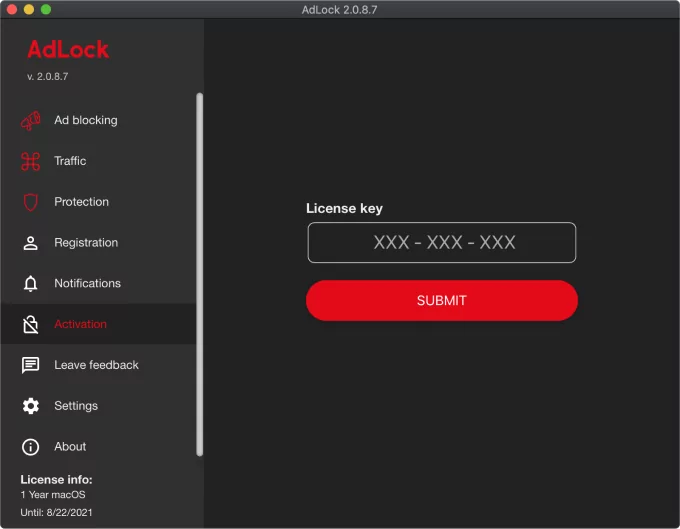
To activate AdLock on your macOS device:
- Run AdLock;
- Locate the “Activation” button and click it;
- Input your key and press “Submit”;
- That's it. AdLock is activated — proceed to set it up.
Setting up adblocking
AdLock application for macOS PCs is a top-notch adblocking software created to ensure a smooth and clean Internet experience. It provides the following set of features:
- Adblocking;
- Safe Browsing;
- Anti-tracking.
Adblocking — a big toggle on the main screen of the application that can’t go unnoticed
AdLock for macOS brushes off commercials on websites and in the installed applications. It clears web pages of advertising content (banners, pop-ups, video/audio ads, etc.) using specific filtering rules.
The undesirable content is filtered even before the page is loaded in the browser, which helps save a lot of traffic.
AdLock’s adblocking functionality is flexibly adjusted to your needs, and you can fine-tune the blocking rules, or turn off filtering on specific websites at your desire.
There is an option of completely halting the adblocking and resuming its work when needed. Filters are updated automatically.
Safe Browsing — enable the enhanced protection of sensitive data
Safe Browsing protects users from visiting fraudulent and malicious web resources that may steal your passwords, bank account details, or payment card data. Also, it prevents malware from being downloaded onto your device.
Please note, that AdLock doesn’t collect, store, transfer, or sell any user’s data.
Anti-tracking — drag the curtain, stay incognito
Websites gather information about their visitors — IP addresses, browser data, operating system info, screen resolution, and even what page the user was redirected from. Hide your online presence, browsing activity, and personal data from advertisers with AdLock’s Anti-tracking function. Enable it to make website owners have a hard time trying to track your online activity.
Upon completion of the setup steps, AdLock will operate efficiently and flawlessly in the majority of cases.
If you face issues, feel free to contact our support agents.
AdLock Installation and Adjustment Guide
*Min. Windows 7 requiredWelcome aboard and thanks for choosing us!
AdLock for Windows is a convenient and fully adjustable adblocker that gives you a leg in saving traffic consumption, makes web pages load much faster, and safeguards your computer from malicious and unwanted content. Also, AdLock is a perfect defender that blocks phishing websites, denies access to adult “xxx” content, disables all bugs and trackers, and avoids unauthorized requests and redirects.Installation
To use AdLock on a PC or tablet running on Microsoft Windows, you should download the installation package and launch it. Perform the following actions:- Open your browser;
- Proceed to the AdLock website by typing adlock.com/exe/ in the search bar;
- In the “Products” menu tab press “AdLock for Windows” and then press “Download”;

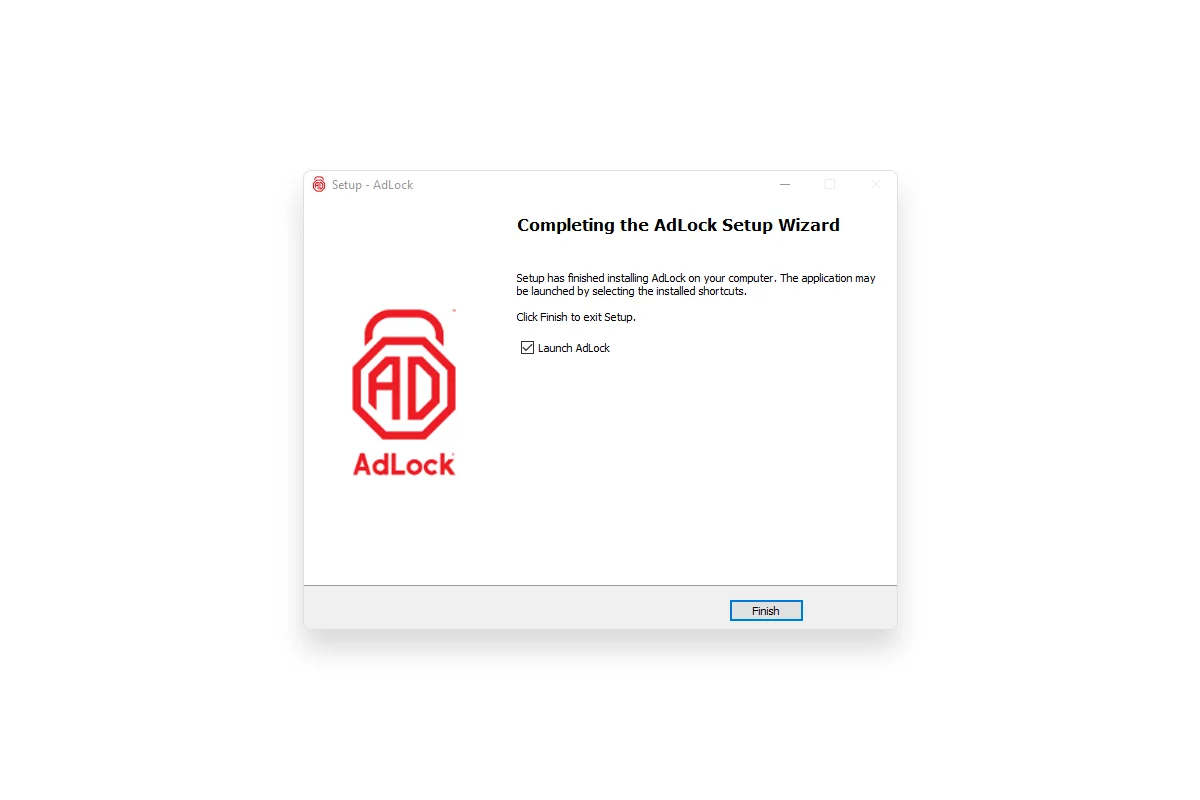
- Run the executable file “AdLock_Installer.exe”;
- Click “Yes” in the “User Account Control” dialogue box requesting to allow the app to make changes to your PC;
- Choose the folder on your PC for the app to be installed to;
- Proceed with the installation and then click “Finish”.
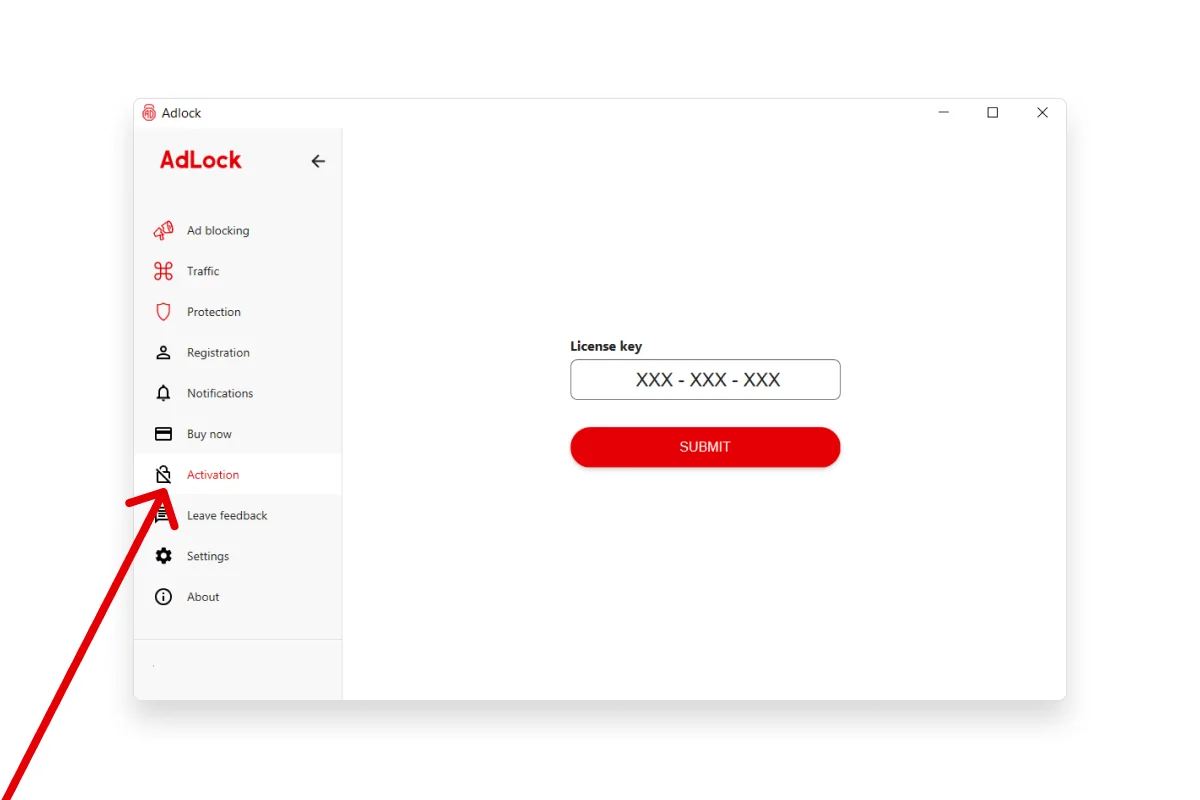
 To activate AdLock on your Windows device:
 - Run AdLock;
- At the bottom of the main window press the “Activation” tab;
- Input your key and press “Submit”;
- That's it. AdLock is activated — proceed to set it up.
Setting up adblocking
AdLock application for MS Windows is a next-generation adblocking software created to ensure a smooth and clean Internet experience. It provides the following set of features:- Adblocking;
- Safe Browsing;
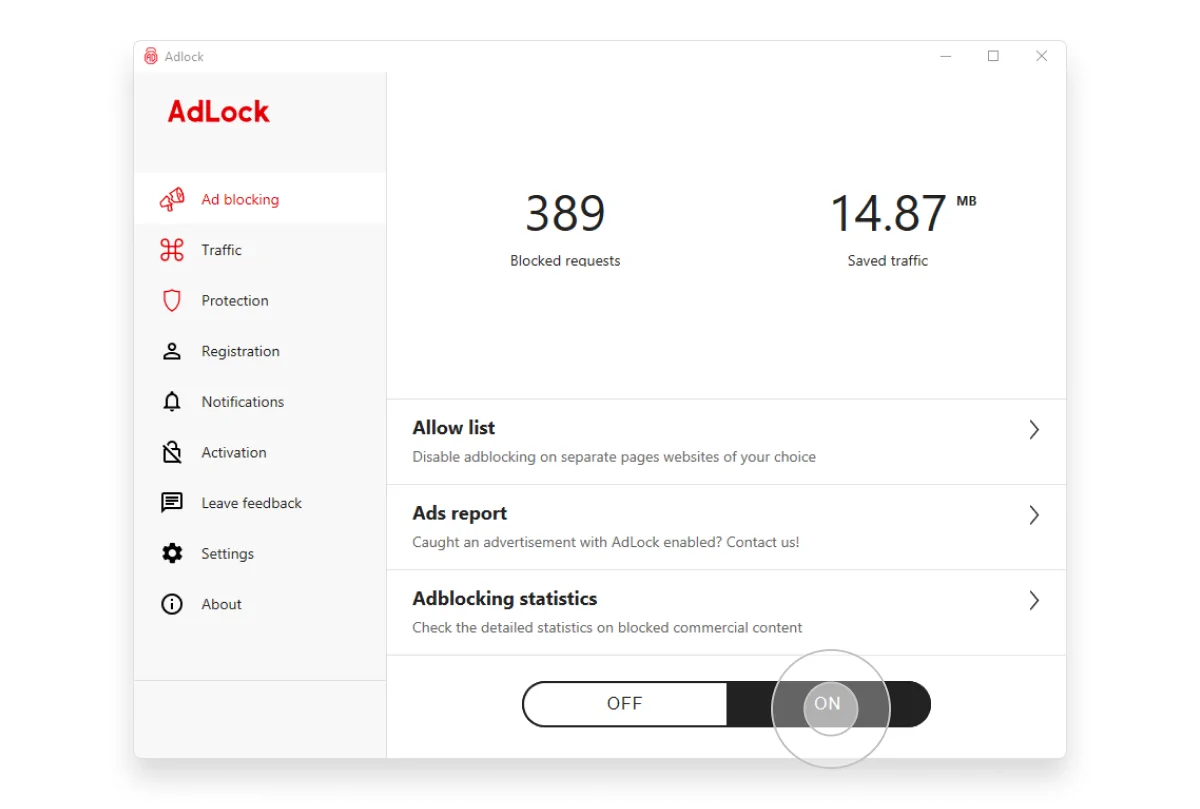 AdLock for Windows filters off ads on websites and in the installed applications. It works well with all browsers and clears web pages of advertising content (banners, pop-ups, video/audio ads, etc.) using specific filtering rules. The undesirable content is filtered even before the page is loaded in the browser, which helps save a lot of traffic. AdLock’s adblocking functionality is flexibly adjusted to your needs, and you can fine-tune the blocking rules, or turn off filtering on specific websites at your desire. There is an option of completely halting the adblocking and resuming its work when needed. filters are updated automatically. Safe Browsing — enable the enhanced protection of sensitive data
 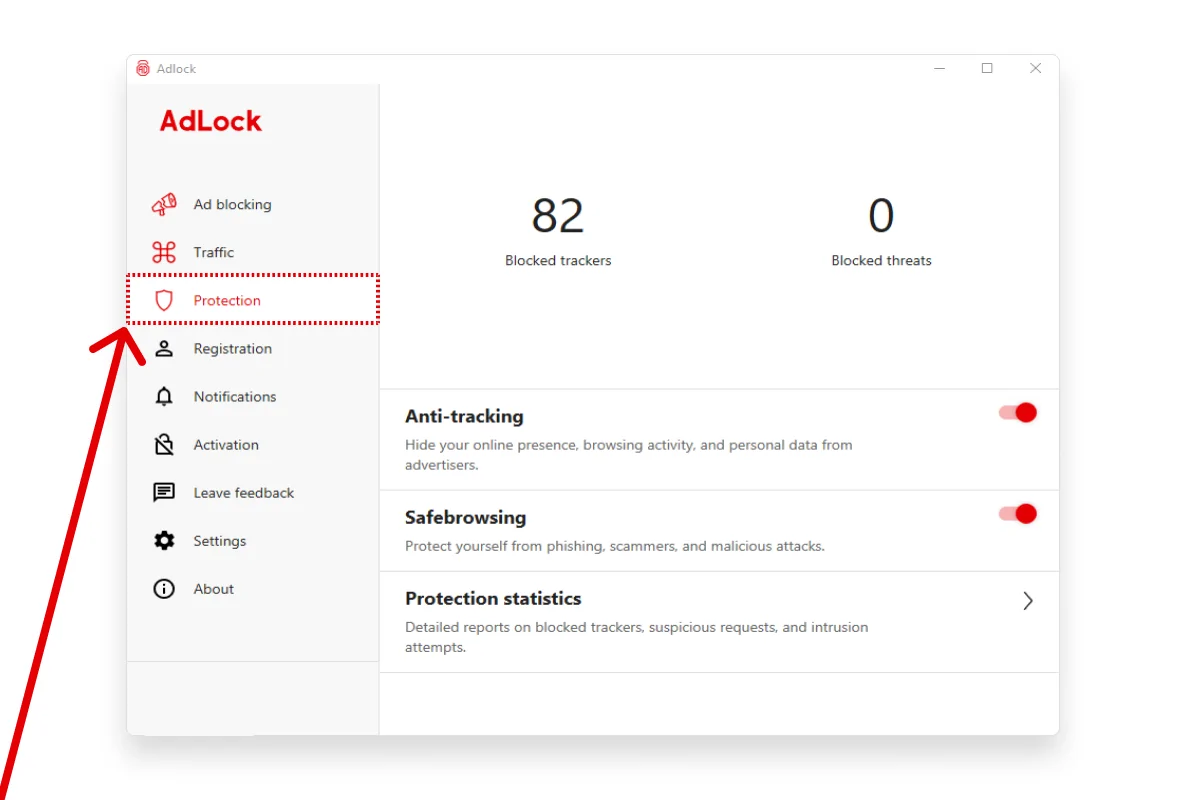 Safe Browsing protects users from visiting fraudulent and malicious web resources that may steal your passwords, bank account details, or payment card data. Also, it prevents malware from being downloaded onto your device. Please note, that AdLock doesn’t collect, store, transfer, or sell any user’s data.
AdLock certificate
By default, AdLock is set up to block adverts on browsers and applications via http and DNS filtering. It processes the incoming internet traffic and traces the encrypted content that contains diverse types of undesired content by launching a MITM attack and replacing the application’s security certificates with a custom AdLock certificate. Please note, that the certificate is uniquely generated for every device and is stored locally. It gives no way of accessing or stealing your private data even if it somehow fell into the hands of third parties. Unlike the procedure of certificate installation on Android devices, AdLock for Windows does it automatically, without any obstacles. At the same time, such third-party software as antivirus may interfere with the installation process so it's important to make sure AdLock and its services are added to the antivirus and firewall exception lists.Filters list
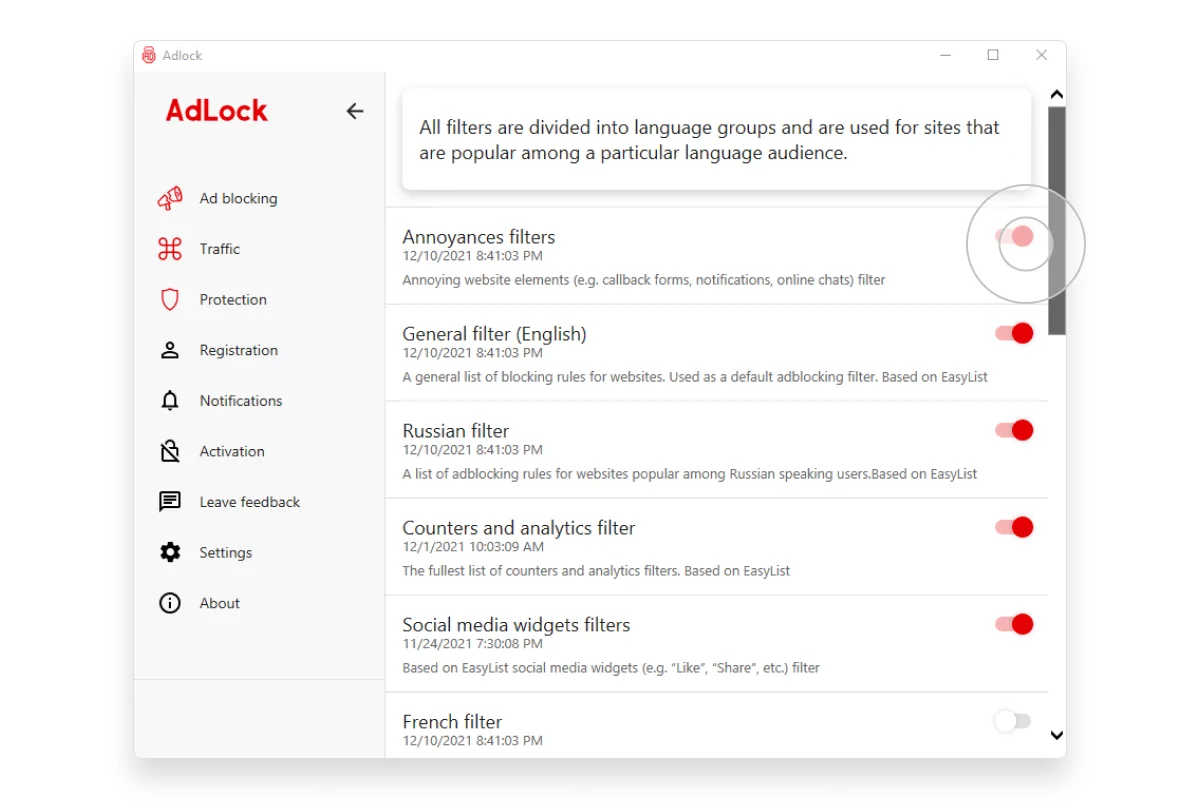
Please, be aware, that there are regional filters that come into action from the perspective of your OS language. Also, there is a "General" (English) filter which is enabled by default. You may enable all required filters to meet your specific needs. The list can be found:- Click the "Settings" tab;
- Click the "Ad filters".
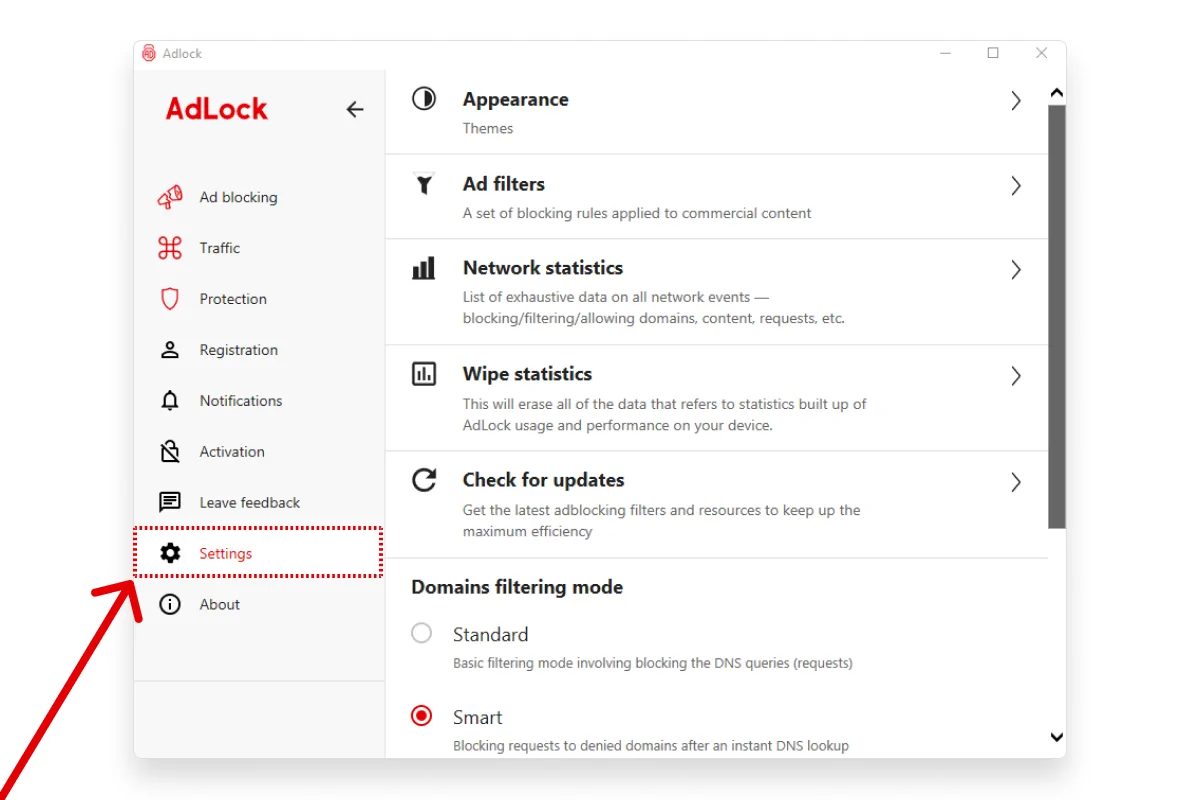
Domains filtering modes
AdLock stores advertising, tracking, unwanted, and malicious domains in hashes, and compares queried domains with the banlist locally, which means not a single request goes out of the device. AdLock guarantees that no DNS queries, no data on the network connection, or other data concerning the user’s device go to AdLock or third-party servers (unlike other services and programs that use adblocking DNS servers on the Internet).Standard
All DNS requests that your browsers or apps queue up for resolving domains first get processed by AdLock. All apps except the list of predefined applications — apps without ads, finance and banking applications, etc. AdLock processes and identifies requests to advertising, tracking, unwanted, and malicious domains for further blocking, so such domains become unavailable.Smart
In this mode, AdLock does not process DNS queries at all. Filtering of traffic goes with a more complex approach (also known as DPI). This means more thorough and selective filtering of user applications and browsers included in the list of filtered software. But this still implies blocking access to determined servers. For deep and flexible filtering of content, you must enable HTTP (http) filtering. This applies sophisticated filtering methods paired with beautifiers (cosmetic filtering) and a more complex syntax.Bottom line
This is the end of the guide. Here's the resulting checklist to go by:- Download and install the EXE file;
- Run the application;
- Enable "Ad blocking" and "Security" options;
- Make sure that http and DNS filtering are enabled in the "Settings" tab;
- Adjust filters.
AdLock Installation and Adjustment Guide
*Min. Android 8 requiredWelcome aboard and thanks for choosing us!
AdLock for Android helps to get rid of annoying commercial content on websites and in applications on handheld devices — smartphones and tablets. In addition, AdLock provides reliable protection against fraudulent redirects, websites containing malicious software, and services that gather browsing history and statistics.Installation
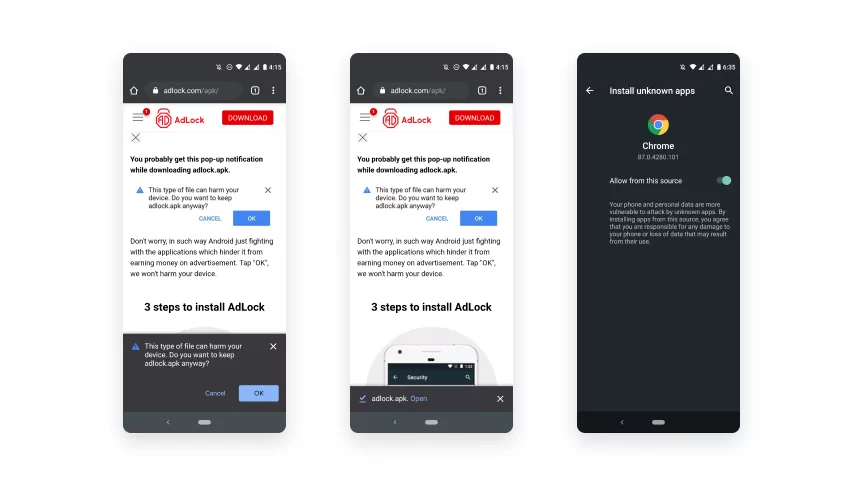
Generally, Android applications are available on Google Play Market, but you won’t find AdLock there. The reason for this is that Google prohibits the distribution of network-level ad blockers via Google Play. So, you should install AdLock for Android manually. To make sure everything goes fine, allow installing applications from unknown sources: For devices running on Android 8 and above:- Start downloading AdLock APK;
- The operating system of your device will ask you to allow permission. Enable the “Allow” option and then resume the installation.
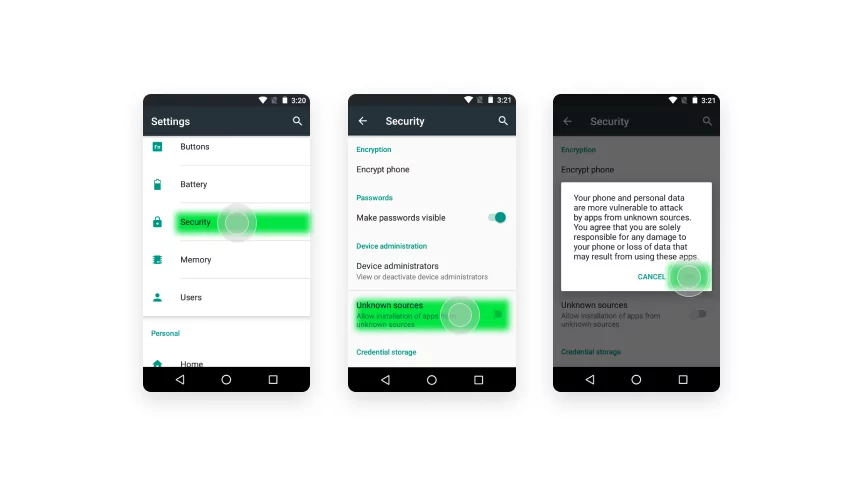
For devices running on Android 7:
- Open “Settings”;
- Proceed to “Additional settings” in “System & Device”;
- Switch on “Unknown sources” and press “OK” in the system warning window.
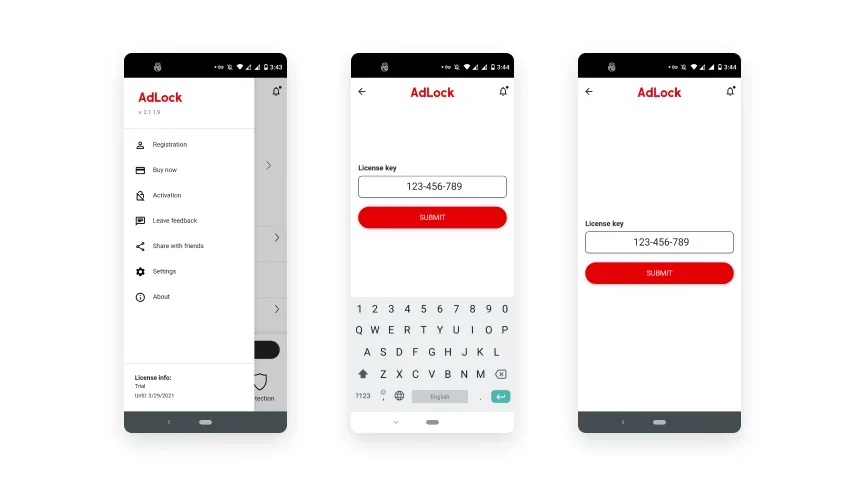
 To activate AdLock on your Android device:
- Run AdLock;
- Tap the hamburger menu button (“≡”);
- Then tap “Activation”;
- Input your key in this window;
- That's it. AdLock is activated — proceed to set it up.
Setting up adblocking
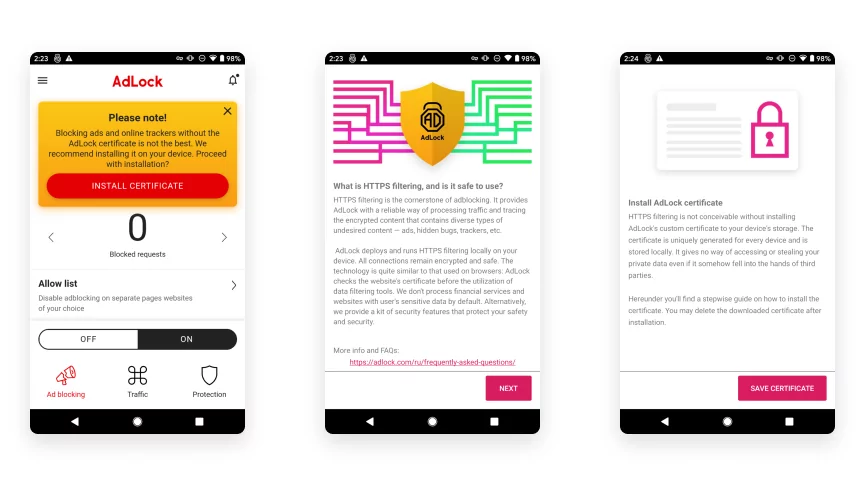
By default, AdLock for Android is set up to block adverts on browsers and applications via http and DNS filtering. AdLock processes the incoming internet traffic and traces the encrypted content that contains diverse types of undesired content — ads, hidden bugs, trackers, etc. To remove ads from applications that use secure connections (e.g., http), AdLock launches a MITM technique and replaces the application’s security certificates with its certificate.AdLock certificate
AdLock custom digital certificate is a tool ensuring efficient adblocking by providing the possibility of filtering the http traffic (used by most types of ads). The certificate is uniquely generated for every device and is stored locally. Please note, that it gives no way of accessing or stealing your private data even if it somehow falls into the hands of third parties.Installation of AdLock certificate on Android 7
In older versions of Android, the certificate is installed automatically during the onboarding process or via AdLock settings. Its installation requires a couple of taps. The easiest way is, of course, to install it right during the onboarding. So, as soon as you launch AdLock for the first time, you'll see a welcoming screen with a big red button "Get started". Press it and follow the instructions. The application will prompt you to download the certificate, so accept the dialogue and follow the steps shown on the screens: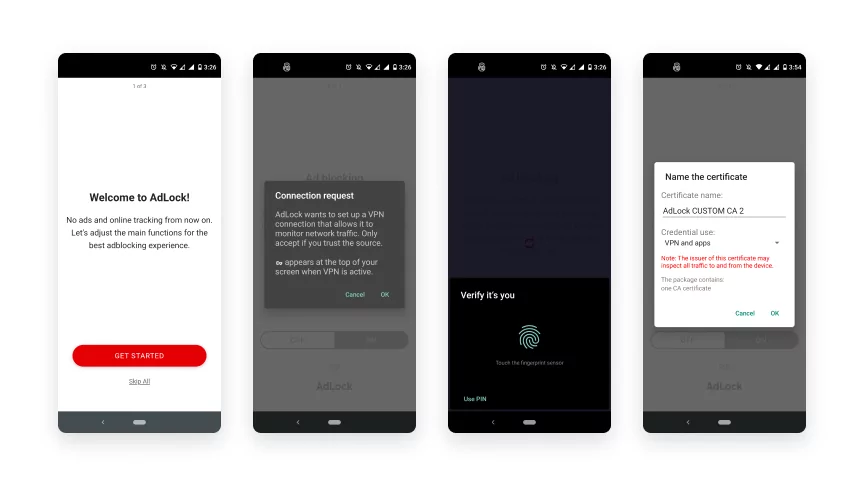 During the procedure, you’ll be asked to confirm your identity and actions via a graphic key/user password. This means you’ll have to set a key or enter it if you already have it set. Please note, this is a means of security required to ensure that you’re the owner of the device.
Installation of AdLock certificate on Android 11
To install the AdLock certificate on an Android 11 device, you should download and save it on your storage.- Run AdLock;
- Press the hamburger menu button (“≡”) at the top left corner of the screen;
- Tap "Settings";
- Then choose "Download AdLock certificate";
- The browser chosen to be used by default will launch and ask you whether you agree to save the certificate.
 After the certificate is downloaded, you can install it via your device's file explorer:
- Locate the previously downloaded certificate by using the file explorer;
- Tap the certificate file;
- Confirm your identity by entering the graphic key/set the graphic key for future actions;
- Name the certificate (or leave the default "AdLock Custom CA...");
- Tap "OK" and the "Done".
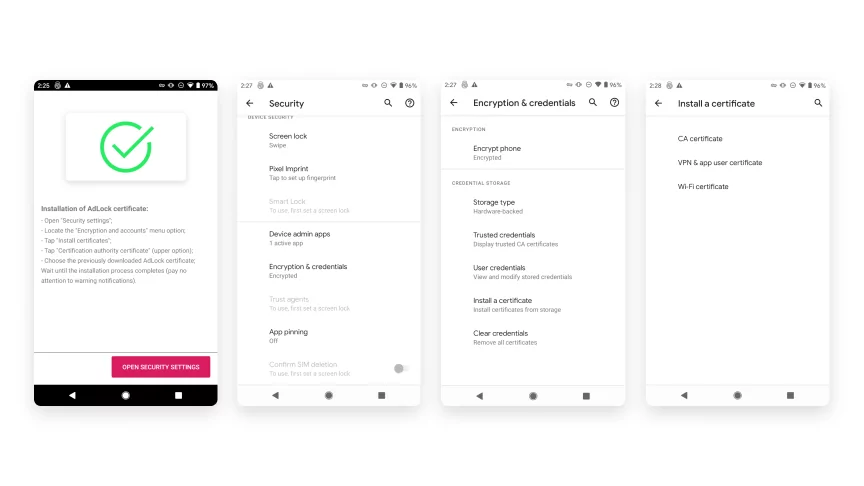 Proceed to the "Settings" menu of your handheld device and then:
- Tap "Biometrics and security";
- Choose "Other security settings";
- Then tap "Install from storage" (install certificate) and choose "Certificate CA";
- Locate and choose the previously downloaded AdLock certificate;
- Tap "Done".
Firefox certificate
Currently, the Firefox browser on Android does not allow installing and using third-party certificates, which makes it impossible for AdLock to perform http filtering on the browser. To admit, http filtering is the process that is critical for efficient adblocking. Nevertheless, the solution is easy. Mozilla suggests downloading Firefox Nightly which provides this possibility. This means if you prefer using Firefox on your smartphone and wish it to be ad-free, then you need this duo — AdLock and Firefox Nightly. After you get Firefox Nightly you should do several adjustments. First, you should configure the browser to use the Certificate Store. Type about:config in the address bar and accept any warnings is prompted. Then, create a new boolean value and input security. enterprise_roots. enabled as the Name. Set the value to True.Why is a VPN connection created?
AdLock uses VPN to filter traffic and block requests for phishing and malicious websites. The VPN server is deployed locally, on your device. This allows speeding up the blocking function and also implies that the AdLock servers are not involved in this process. Note, that we neither route your traffic through any third-party servers nor collect/transmit/sell any data when this VPN is deployed. Important: only one VPN service can be established at a time, which means that the existing interface is deactivated when a new one is created. In other words, if you have a separate VPN application running and then switch ON AdLock, the previous app’s VPN connection would get terminated and vice versa: if AdLock is ON and you run another VPN app, the adblocking by our software pauses. This is due to Android OS’s technical specificity.Adding AdLock to the quick access shade
After you've finished installing AdLock on your Android, slide the quick access shade, tap the "Menu" button, and then "Button order". Select the AdLock icon to then drag and drop it to the most suitable place of your choice. Please note, that the procedure may be different depending on the device brand but overall, it's quite similar on all Android phones.DNS settings
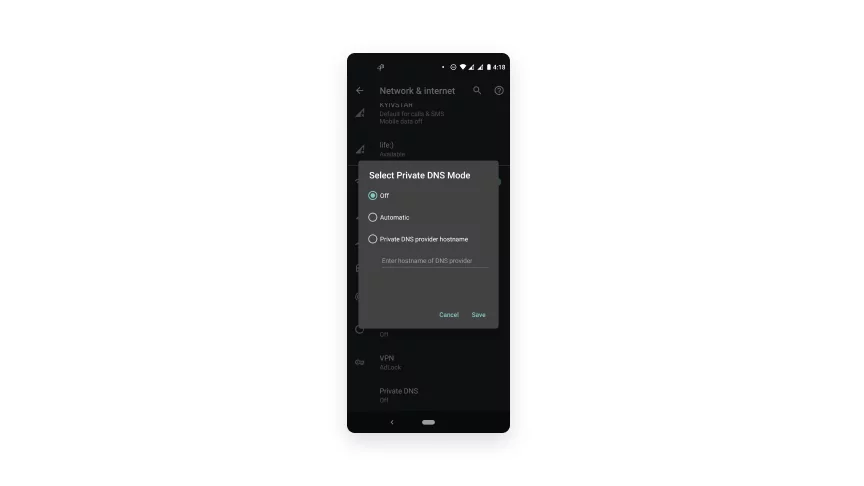
Recent Android OS versions have a DNS request encryption setting that interferes with AdLock operations if enabled. For the correct and efficient adblocking by AdLock, you should turn Private DNS off in your device settings. Please note, settings can vary by phone/tablet.- Open “Settings”;
- Tap “Network & Internet”;
- Proceed to “Advanced” and then “Private DNS”;
- Switch it off.
 Upon completion of the above-mentioned steps, AdLock will operate efficiently and flawlessly in the majority of cases. If you face issues, feel free to contact our support agents.
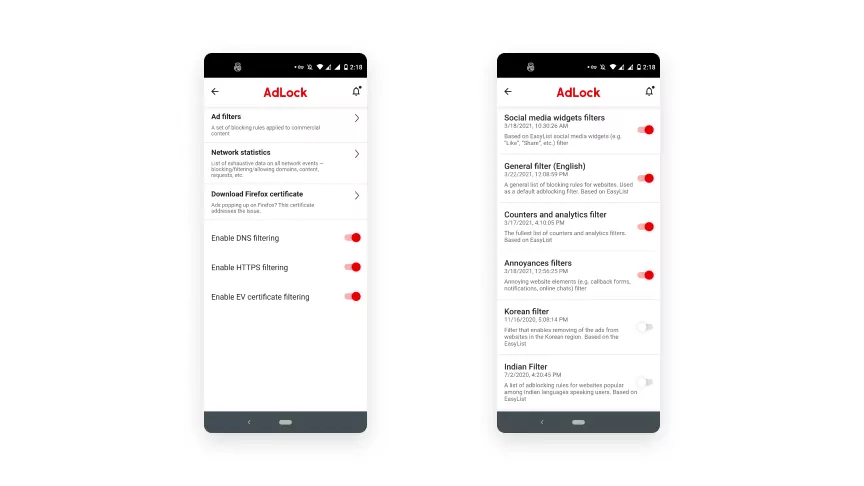
Filters list
Please, be aware, that there are regional filters that come into action from the perspective of your OS language. Also, there is a "General" (English) filter which is enabled by default. You may enable all required filters to meet your specific needs. The list can be found:- Tap the hamburger menu button (“≡”) on the top left of the main screen;
- Tap "Settings" menu item;
- Choose the "Filtering" tab in the appeared screen;
- Tap "Ad filters" to see the screen of filters.
Bottom line
This is the end of the guide. Here's the resulting checklist to go by:- Download and install the APK;
- Run the application and complete the onboarding;
- Disable the default Android DNS and switch ON the AdLock's DNS filtering;
- Enable HTTP filtering (install custom AdLock http certificate);
- Adjust filters.
Latest news


Fill out the form and we will contact you shortly
